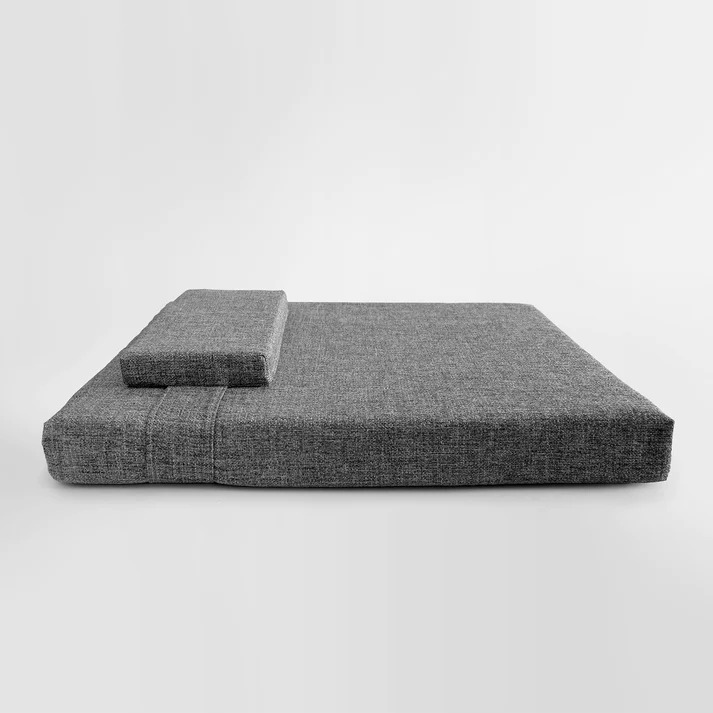
Memory foam beds provide amazing orthopedic support for your canine companion. However, with premium beds costing over $100, they can be pricey purchases. Thankfully, making your own DIY memory foam bed at home is an easy and affordable alternative!
In this post, we’ll walk through a step-by-step guide to creating a customized
Memory Foam Dog Beds for a fraction of the store costs. We’ll cover how to choose the right foam, calculate measurements, find budget-friendly covers, and bring it all together into a cozy bed your dog will adore.
With just a few inexpensive supplies and materials from your local hardware store, you can become your own doggie bedding master crafter! Learn just how simple it is to make a supportive memory foam haven tailored to your pup’s needs. Let’s get started on this satisfying DIY project that will save you money while still providing comfort for your furry friend!
Choosing the Best Foam
The key component for proper orthopedic support is choosing a high density, quality memory foam insert. Here are the ideal foam specifications for a
Cozy Dog Bed:
Density: Look for memory foam with a density of at least 4 pounds per cubic foot. This mid-range density provides cushioning while still supporting your dog’s joints. Higher densities like 5-7 lbs/cu ft offer maximum support for large breed dogs.
Thickness: For most dogs, a 3 or 4-inch thickness gives adequate comfort without being overly bulky. Smaller dogs only need 2 inches, while large breeds benefit from 5+ inches.
Memory Foam Type: Traditional (viscoelastic) memory foam is cost-effective while still being supportive. Cooling gels and plant-based foams cost more but sleep cooler. Opt for traditional to save money.
Shape: Contoured wedge shapes can provide ergonomic comfort, but rectangular slabs are the most budget-friendly shape. Cutting foam into custom shapes takes skill.
Cover: Foam should have a removable cover to allow washing. But bare foam without a cover is cheaper to buy. You’ll add your own cover.
With the right specs, foam provides cushioning while supporting your dog’s joints, muscles, bones and circulation. Pay close attention to the density rating to ensure adequate support. Resist cheap polyurethane foams that compress permanently.
Shop at online retailers like Foam Factory, Foam by Mail and Mattress Insider for quality bulk foam you can customize sizing for. Only you know your dog’s needs, so use that to choose memory foam dog bed that’s just right!
Measuring Your Dog
Next comes the fun part – determining the ideal size for your DIY bed based on your dog’s proportions! Follow these steps:
1. Measure your dog in inches while they are laying on their side in a naturally relaxed, fully extended position. Take the measurement from the tip of their nose to the base of their tail. Add 12 inches to allow your dog to stretch out.
2. Next, measure from the floor to the highest point of your dog’s torso when laying on their side. This establishes the ideal thickness. Add 2-3 inches for growing room if your dog is a puppy.
3. Finally, measure across the widest part of your dog’s torso when lying down – usually the chest/ribs. Then measure from their elbows to the top of their hips for width.
4. Use the length + thickness for cutting the foam. The width and torso width will help select a cover size that’s not too baggy or tight.
Keep in mind that dogs like to sprawl! Don’t skimp on sizing – overestimate measurements if anything to provide space to lounge. Once cut, foam can’t be added back and you can’t make a cozy dog bed, so allow generous proportions for full comfort.
Now you have the ideal dimensions to turn a slab of memory foam into the perfect customized bed for your pooch! Our next steps cover cutting the foam and selecting outer covers to finish it off.
Cutting the Foam
With your dog’s measurements and foam selected, it’s time to start cutting to make a perfect memory foam dog bed! Follow these steps for safely and cleanly cutting memory foam:
Supplies Needed:
– Electric carving knife
– Ruler or measuring tape
– Pencil
– Eye protection
– Respirator mask
Steps:
1. Clear ample workspace where foam dust can be contained. Lay foam on flat surface.
2. Use a pencil to draw cut lines on BOTH sides based on your dog’s length + thickness measurements. Double check accuracy!
3. Plug in and carefully use the electric carving knife to cut along lines on one side. Apply steady, even pressure as you cut.
4. Once first side is cut, flip foam and repeat on second side. The two cuts should match up cleanly.
5. To further shape the foam, trim off corners at angles or create contouring curves if desired.
6. Use a fine grit sandpaper to smooth any rough edges and even out the foam shape.
7. Spot clean dust and debris using a damp cloth. Allow foam to fully dry before adding covers.
Key Tips:
– Cut slowly and let the knife do the work
– Keep knifes and hands stable to ensure straight cuts
– Work in a well-ventilated area and wear protective gear
Take your time to cut precisely – don’t rush the process! Soon you’ll have a tailored slab of memory foam ready for adding cozy covers and turning it into Fido’s dream bed!
Creating a Cover
Now for the fun finale – selecting outer and inner covers to finish off your memory foam base. Here are budget-friendly options for making a cozy dog bed:
Outer Cover:
– Old pillowcases or duvet covers
– Tablecloths
– Large pieces of fleece or flannel
– Bed sheets, blankets or mattress pads
Inner Lining:
– Incontinence pads
– Reusable pee pads
– Leftover foam scraps
– Shower curtain liner
– Tablecloth lined with plastic
Ideas for Outer Cover:
– For a simple cover, use a twin-size duvet or sheet folded in half over the foam. Secure underneath with safety pins.
– Sew two same-size squares of fleece with 1-inch seams for a basic envelope style. Leave one side open for inserting foam.
– Cut and sew a simple shape like a rectangle or rounded square out of fabric. Sew together leaving an opening.
Ideas for Inner Lining:
– For basic waterproofing, cover foam in a plastic shower curtain liner or tablecloth before inserting outer cover.
– Layer pee pads inside other covers to absorb accidents.
– Use incontinence pads around the edges for added moisture protection.
Tips:
– Use fabric glue or pinking shears when cutting fabric to prevent fraying seams.
– Look for durable, machine-washable fabrics like canvas, denim or microsuede.
– Add ties or Velcro closures to secure covers closed for washing.
Raid your linen closet for old sheets, pillowcases and bedspreads waiting to be upcycled into your dog’s new bed! Follow our instructions to create a cover as simple or elaborate as your skills allow.
Putting It All Together
Once your memory foam base is cut and covers prepared, it’s time for the fun part – assembling everything into the final cozy dog bed masterpiece! Follow these steps:
1. Place your sewn outer cover right side out on the floor and open the closure.
2. Optional – Lay waterproof plastic shower liner or other lining over cover if using.
3. Carefully position your memory foam base on top of the opened cover. Center and fold edges over if needed.
4. Wrap outer cover fabric around foam, smoothing out any wrinkles or bunching.
5. Secure the opening closed using safety pins, ties or Velcro strips. Make sure closure is tight so foam doesn’t shift.
6. Add a second cover over the first for additional coziness and durability. Experiment with layers and fabrics!
7. Fluff, arrange and customize with embellishments! Add corner ties, embroider dog’s name, etc.
8. Allow any glues or adhesives to fully cure before giving the bed to your dog.
9. Have your pup test it out and observe them on the bed. Tweak as needed for their comfort!
10. Wash and air dry covers regularly to maintain freshness and hygiene. Spot clean foam as needed.
Follow your creativity when assembling and embellishing! Involve kids for a fun craft project. The process is highly customizable to your dog’s unique needs and your personal style.
Memory Foam Dog Beds: a Pet-Friendly & Budget-Friendly Choice!
Creating your own memory foam bed is deeply satisfying and rewards your pup with comfort and support. By following this budget-friendly guide, you can craft a bed your dog will love – at a fraction of typical retail costs.
The level of effort is highly flexible depending on your skills and resources. Even a basic DIY cozy dog bed surpasses pillow stuffing and polyfill that compress over time. And you can always remake covers periodically for a fresh look while reusing the foam.
Memory foam is a worthy investment in your dog’s rest and joint health. By crafting your own bed, you get to control the materials and quality that specifically matches their needs. That peace of mind is so valuable!
Whip up an amazing memory foam bed your best friend deserves with our helpful step-by-step instructions. Your dog will thank you for the restful comfort and you’ll love showing off your handmade creation!
Looking for premium memory foam dog beds without the work? We carry a fantastic selection of highest quality orthopedic memory foam beds at fair prices. Browse our many options and find the perfect fit for your pup!
Read More:
Click Here