
In this article, we will learn about a solution that can perform Office 365 mailbox backup and restore processes in a single utility. If you are also looking for the same, then read this article thoroughly. Also, we will discuss a traditional method to perform the backup task of the Office 365 mailboxes. In addition, we will share the stepwise procedure to perform the backup task.
What do the advantages of backing up Office 365 emails?
Users get various benefits from taking the backup of Office 365 mailboxes into a local drive. Some of the common advantages we share with you are in the below points.
- Office 365 email backup helps users to prevent data from accidental data loss, cyber-attacks, virus attacks, etc.
- Users easily make their data portable to another system by having the backup of Office 365 data in PST.
- With this backup task, users can also free up some space in Office 365 for mailboxes.
- Backup your data into local storage is also helpful in situations where users are looking to migrate to another platform.
To get such benefits, users perform this backup task. Users can also have other factors for which they perform the Office 365 email backup process.
Solutions to backup MS Office 365 data
This backup task can be initiated with the help of manual or professional methods. Users do not process Office 365 backup and restore tasks with the manual method. Users can only perform backup tasks with the help of the manual procedure. In the next section, we will show you the stepwise procedure of the manual method to perform this backup task. So, continue reading the next section to learn the manual method working.
Backup Office 365 data using the manual solution
This manual method will give us the steps to perform this backup task with the help of the content search option. We suggest users execute these steps carefully and back up their important data into PST format.
Stage 1: Log in to Office 365 with your account
We will log in with our Office 365 account and password and then use the eDiscovery Manager option to process this backup task. Follow the below steps to complete this task in a quick way.
Step1: Go to the Office 365 login page and add your account and password to log in.
Step 2: Navigate to the Office 365 Admin Center and click the Security button.
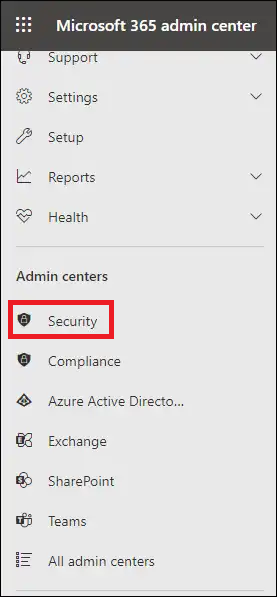
Step3: After that, press the Permissions option and choose the eDiscovery Manager.
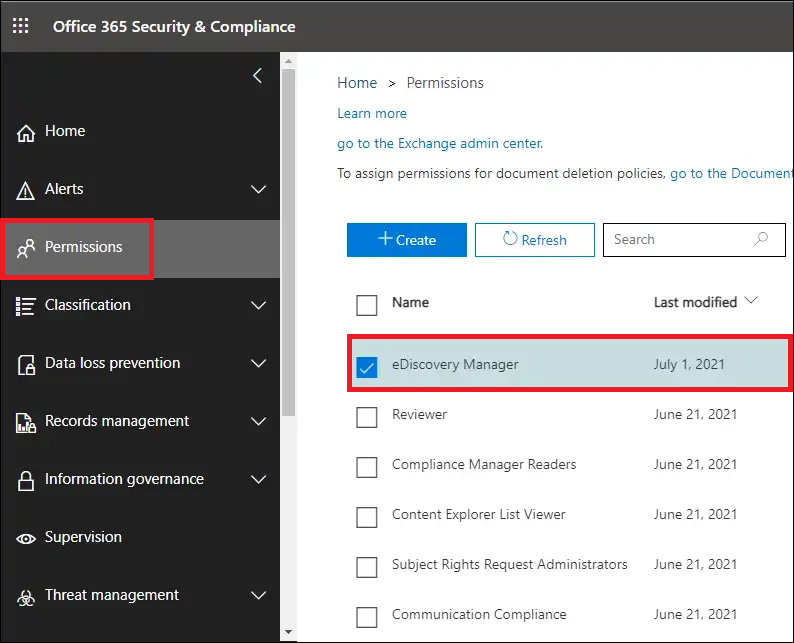
Step 4: Then tap the Edit button.
Step 5: Click the Choose eDiscovery Administrator and then press Save.

Stage 2: Create a new content search
After completing the previous steps, we will create a new content search to proceed with this backup task. Below, we are mentioning the stepwise procedure to do the next actions to back up Office 365 with the manual method.
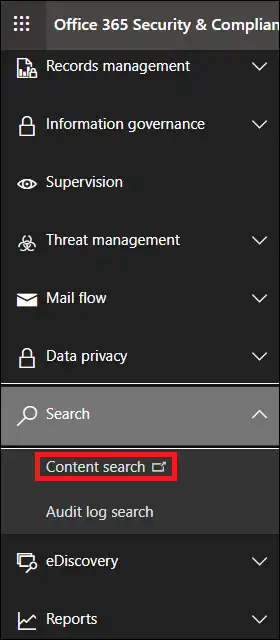
Step1: Go to the Search tab and click the Content Search option.
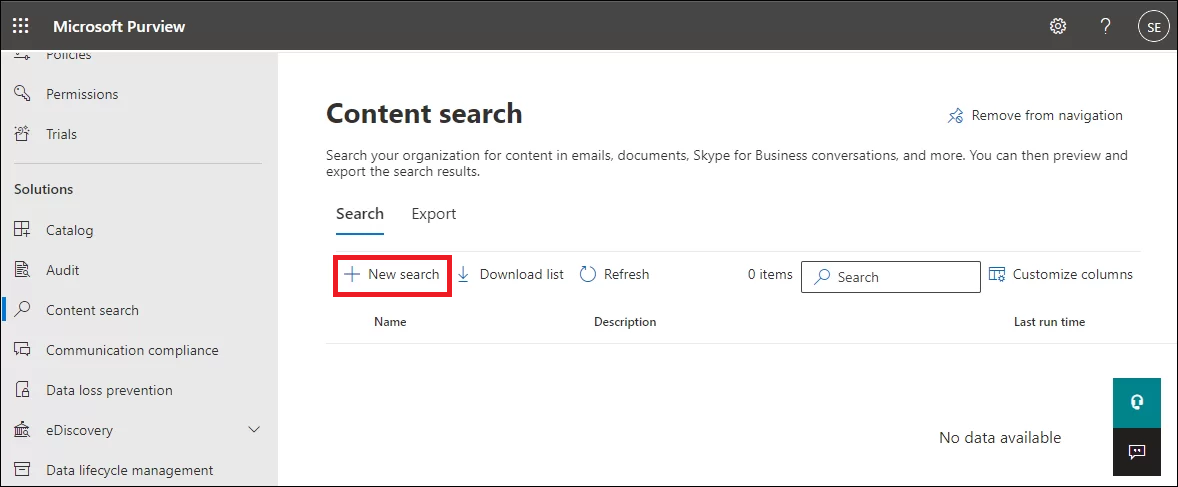
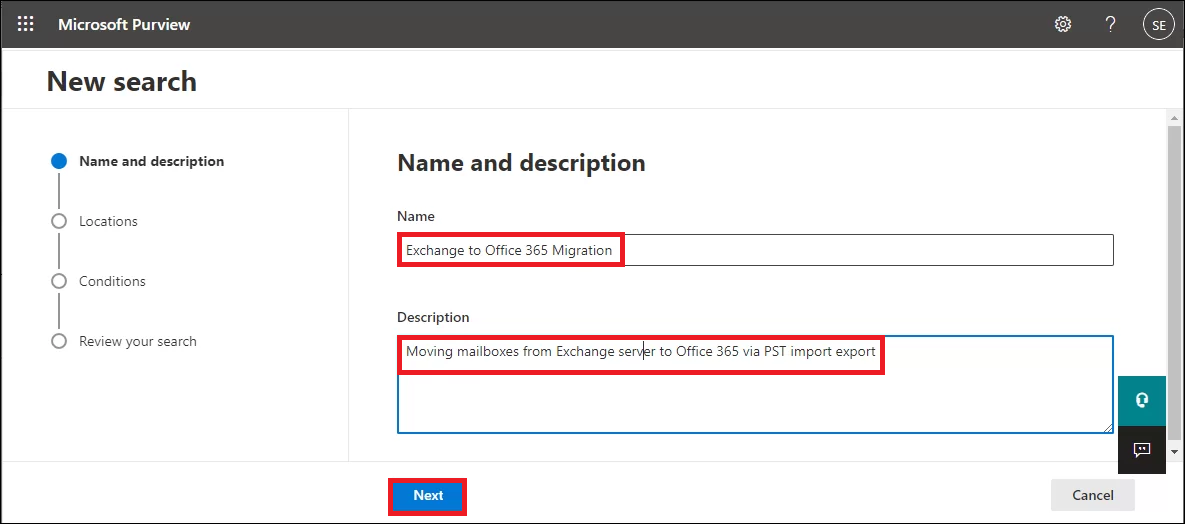
Step 2: Tap the New Search under the Content search tab.
Step 3: Enter the name for your new search and hit the Next button.
Step4: Choose the mailbox you want to back up in the Outlook data file.
Step 5: Add conditions as per your need.
Step 6: Check your search setting and click the Submit button.
Step7: Navigate to the Search list, choose your search, and click the Action.

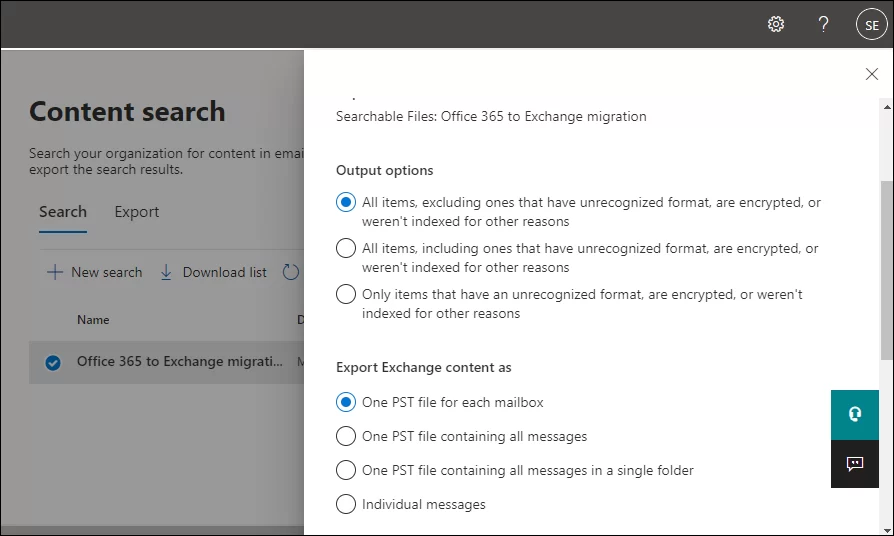
Step 8: Tap the Export result option and choose Output, then press the Export button.
Step 9: Choose the last export from the Export tab and tap the Download results.
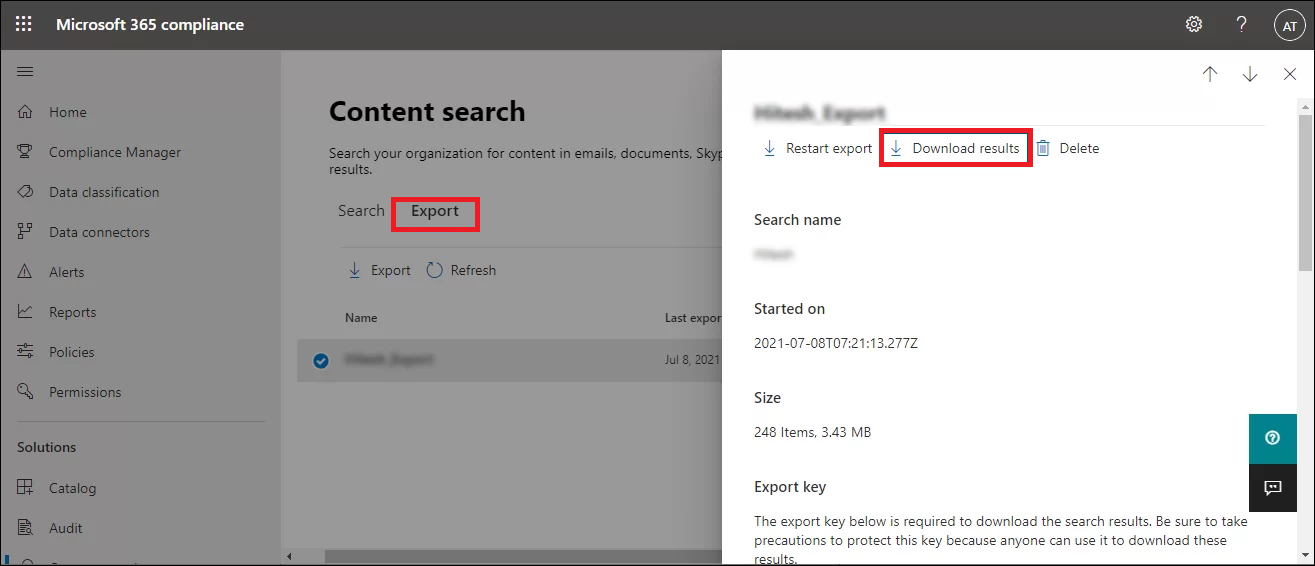
Step10: Scroll through the page and copy the Export key.
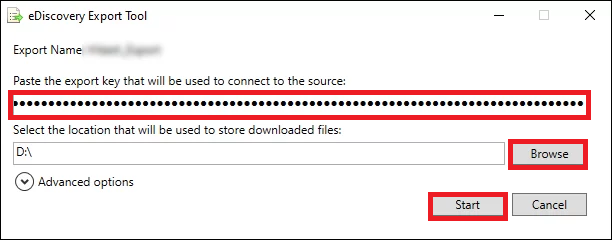
Step 11: Paste the copied key in the eDiscovery Tool. Choose the location where you want to save the resultant PST file.
Step 12: Click the Start button to begin the backup process.
With these manual method steps, users can complete this backup task. But the manual method is not an effective way to complete this task. This method makes the process a bit lengthy and time-consuming. So, before implementing the manual method to perform this task, it is must that users should have complete knowledge of the limitations of this method.
Disadvantages of the manual method
The manual method has multiple steps that users need to follow to complete this backup task. That may make it a bit challenging for users to execute the manual method easily for all users. Here we are sharing some of the common drawbacks of the manual method to complete this backup task.
- The manual method takes too much time to complete the backup of the Office 365 mailbox to PST file format.
- Users should require proper technical knowledge to handle the manual method procedure for backing up Office 365 data.
- Also, this method is not capable of backing up particular items in the Office 365 mailbox.
- Users will not get any advanced feature to complete this task effortlessly in the manual method.
With these difficulties, this backup task could be a hectic task for users. So, they must use a professional third-party tool to complete this task. Now, we will introduce a professional third-party tool that has the capability of processing the Office 365 mailbox backup and restore tasks in an easy manner. Read the next section to get full knowledge of this professional tool’s features and working.
A Third-party Software for keeping a backup of Office 365 emails
The manual method has various drawbacks that may complicate this task for users. Moreover, novice users can face unexpected situations while working with the manual method to process this backup task. Therefore, users must go for the Shoviv Office 365 Backup and Restore Tool and complete this task in a little bit of time. This software works at the fastest speed without harming.
It also offers a filter option that allows users to add or remove items as per their needs. Moreover, this tool also has the capability of restoring mailboxes from various file formats. Check out the below-shared steps to complete this backup task using the Shoviv software.
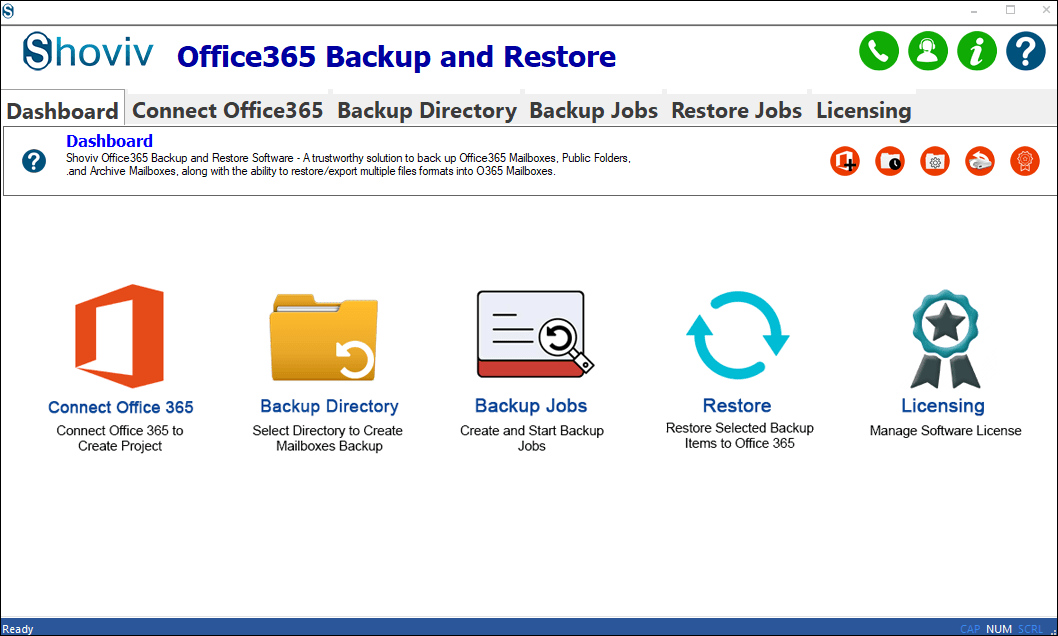
Step1: Install and Open the Shoviv Office 365 Backup and Restore Tool in your system. Click the Connect Office 365 option.
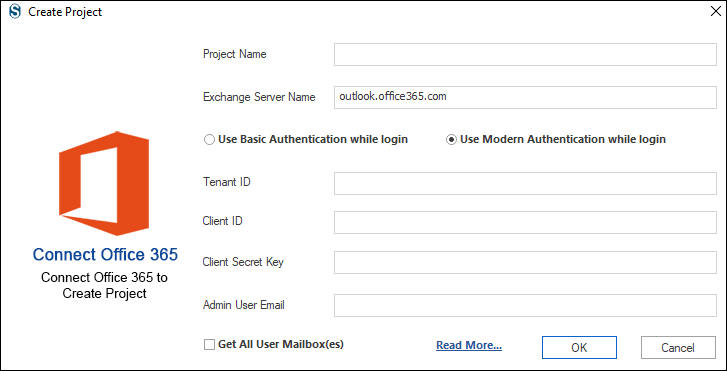
Step 2: Provide the required details to create a Project.
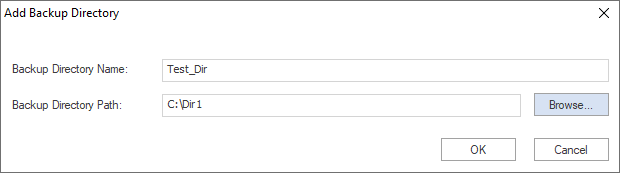
Step 3: Navigate to the Backup Directory and press the (+) option to create a new backup directory.
Step4: Enter the path to save the resultant PST file in the backup directory. Provide the name of the resultant file and click the Ok button.
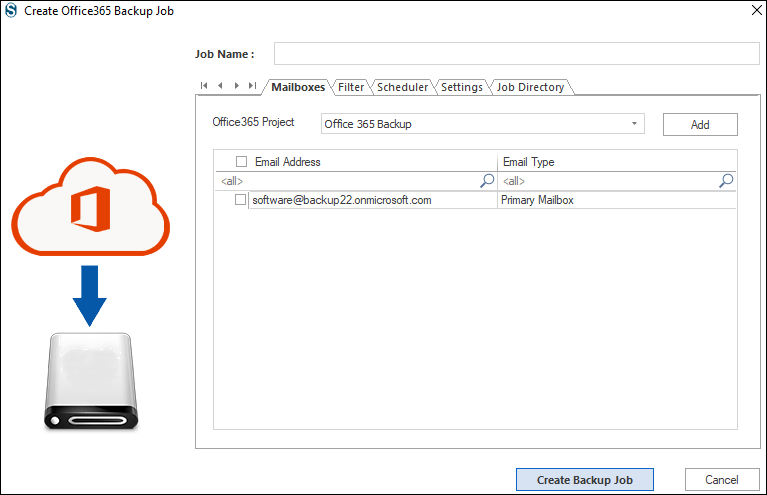
Step 5: Move to the Backup Jobs tab, choose the mailbox type, tap the (+) button, and then create a new backup job.
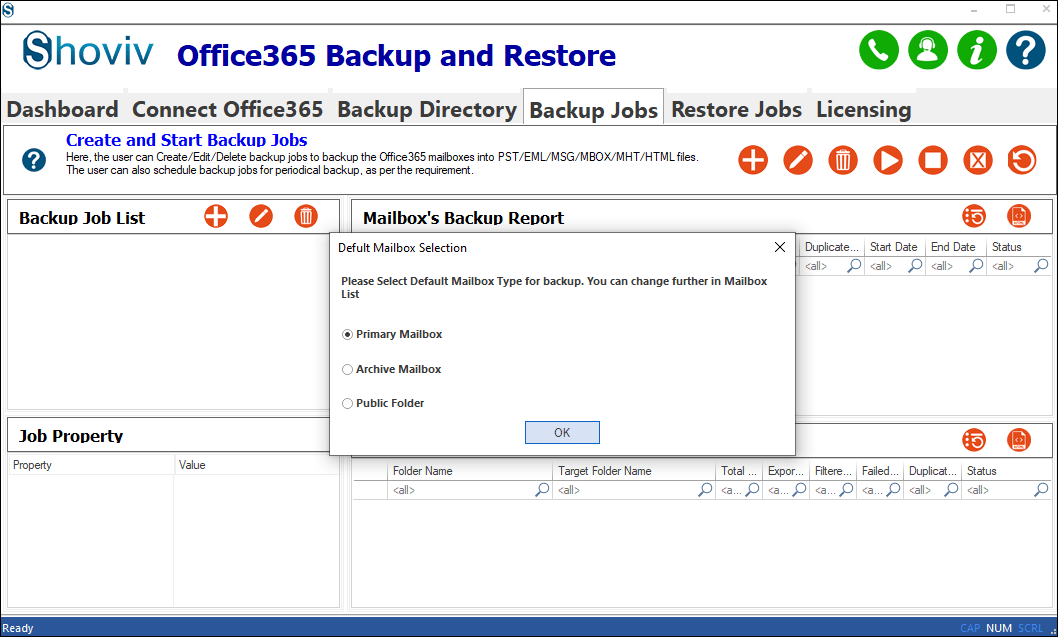
Step 6: After that, choose the mailbox that you wish to back up.
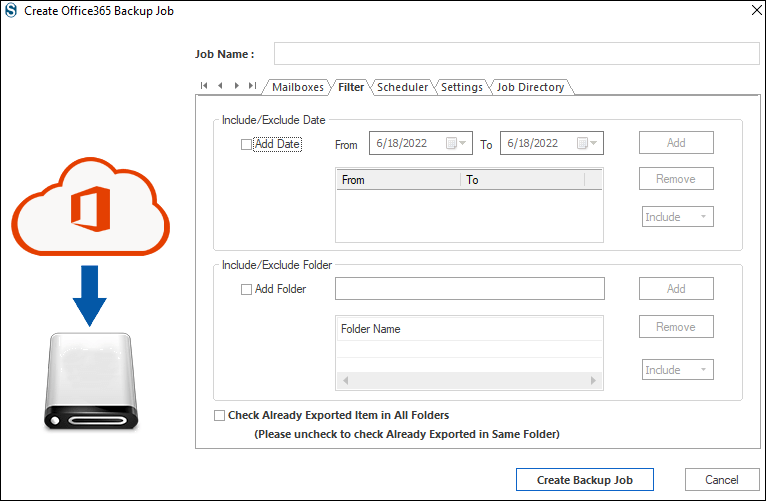
Step7: Include or eliminate items using its filter option as per your requirement. Utilize the scheduler option as per your need.
Step 8: Choose the PST from the file formats option to take Office 365 data backup in the PST.

Step 9: At last, click the Create Backup job. Run the Backup job to begin the backup process. Then, click the Finish button after completing the backup.
Final Words
We have shared two methods to back up the MS Office 365 mailboxes, and we found that the manual method is challenging for users. So, we conclude that the Shoviv professional tool is the best and also has capable of processing Office 365 mailbox backup and restore tasks easily. Try out its free trial version to get more information on its features and practical knowledge of its working.