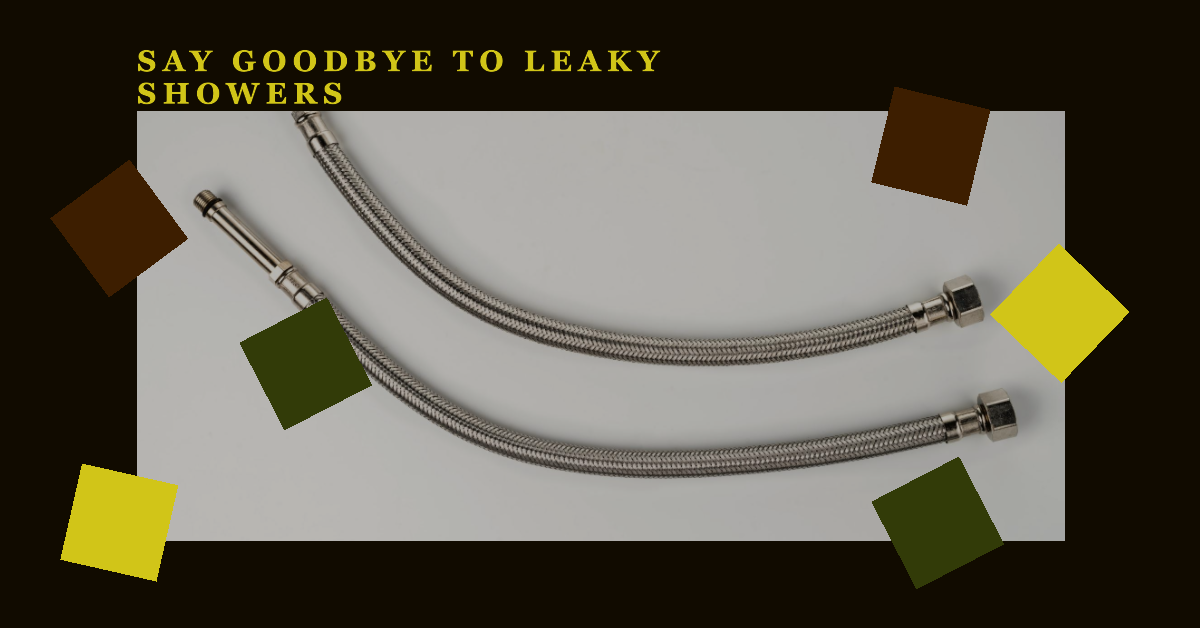
The bathroom faucet is one of the most frequently used devices. Therefore, regardless of the quality of its assembly and material of manufacture, it fails and begins to leak sooner or later. Its most vulnerable component is the repair a shower hose , which is subject to mechanical damage and low-quality water’s adverse effects. Acid and salt deposits destroy the product’s internal structure, and careless operation often leads to breakage of the outer shell.
Repair a shower hose or completely replacing it does not require complex procedures. You can fix it yourself without hiring a professional plumber; the main thing is strictly following specialists’ recommendations.
Design and varieties
Most standard household bathroom shower hoses have an inner rubber tube encased in a metal, rarely polymer, corrugated casing. The outer element protects the rubber product from cracks, breaks, and stretching. At both ends of the hose, install special connectors for connecting it to the mixer and shower head – fittings with union nuts. These fasteners have a special protective coating resistant to scratches or chips. They provide a secure fit and eliminate leakage.
There are hoses without an outer protective sheath of thick, durable rubber.
Such products are inferior to the previous type in terms of quality and service life but have a lower cost.
Due to the product’s simple design, there are few types of breakdowns. The inner rubber tube is often the first to fail – over time, it dries out, crumbles and bursts in places with frequent bends. Connecting fittings break less often – under the influence of impacts and other mechanical damage, union nuts crack, or their rubber seals become unusable.
The third type of failure occurs when the outer protective sleeve is torn or broken. In the first two cases, it is still possible to repair the product, but in the last option, only a complete replacement of the braid or the entire hose is necessary.
Replacement
The complexity of the repair a shower hose will depend on the type of breakdown of the product, the design, and the installation method of the mixer itself. If mounted into the wall for a more aesthetic appearance, dismantling the hose will become more complicated. But in any case, when carrying out work, you will need the following tools:
- pliers;
- adjustable wrench;
- knife;
- screwdriver.
After prolonged use, the threads in these places gradually deteriorate, and the union nuts become loose. Therefore, it will be necessary to seal the joints to prevent leaks.
Before dismantling work
you first need to turn off the water. It is recommended to close the faucet valves and the central shut-off valve under the sink. Only after this can you begin to remove the broken hose. First, you need to dismantle the shower head – hold it with one hand, and with the other, unscrew the union nut, rotating it counterclockwise.
From time of use or under the influence of salts contained in the water, the threads of both elements can stick to each other. To make the procedure more accessible, you need to wipe the surface of the nut dry and wrap it in a thick rag.
In addition, most products have a hexagonal shape, making it difficult to dismantle with bare hands. Therefore, it is unscrewed with an adjustable wrench or pliers also pre-wrapped in a rag or napkin; for convenience, you can wrap electrical tape around it. It would help not to squeeze the nut too hard; you must carry out the work carefully and control the pressure.
Before starting repair work
you must establish the cause of the breakdown – inspect the hose and determine where it broke or leaked. If there is a rupture or a crack in the inner rubber tube, water begins to flow through the outer shell, practically not entering the watering can sprayer. In this case, it is necessary to remove the line and shorten it to the point of rupture.
The tube is then inserted back into the braid and secured with the same metal sleeve. The bushing may fit tightly into the newly formed cut area; first, clean it of limescale and moisten it with water. After this procedure, the inner tube will become shorter, and the metal shell will remain the same length; this will make the hose more rigid,
However, it is worth noting that such balcony repair in melbourne is only possible if a crack in the rubber has formed close to the seat.
If the inner tube bursts in the middle of the hose, there is no point in shortening it since the outer casing does not require cutting.
When damage or stretching of the protective braid occurs, the repair process involves similar actions:
- unscrew the union nuts;
- remove the mounting sleeve;
- remove the rubber tube;
- insert it into a new shell; clean and reinstall the bushing.
Leaks often occur due to the failure of rubber seals (gaskets). They are installed inside the union nut where the sleeve meets the end of the shower head or faucet. This is the simplest type of repair of shower hose – you need to unscrew the nut and replace the worn gasket with a new, similar part.
Install A new or repaired hose in the reverse order.
First, screw on a shorter, hexagon-shaped union nut. Before screwing on the element, it is essential to place the rubber seal inside. Additionally, especially when reinstalling a repaired product, you can wrap plumbing fum tape around the threads of the landing tube coming out of the mixer.
Also Read: Top 10 Facts About the Sword
Tight The nut is clockwise, but it is essential to do what is necessary – when drawing it, it is unnecessary to use pliers or an adjustable wrench; basically, hand strength is enough. After tightening, water oozes out from under the nut; this often occurs when reinstalling an old product. Then, pressing it with pliers slightly is permissible, and it is better to wind several extra layers of fun tape.
Here, you also need first to ensure an internal rubber gasket and wind the fum tape if necessary. Upon completion of the work, it is essential to check the quality of the work – open the central tap and valves on the mixers. There should be no leaks, only at the junction of the hose with the mixer or shower head. Then you will need to reverse dismantle, ensure the rubber gaskets’ integrity, change them as needed and add a few more layers of fun tape.